


There are two different types of dynamic mics, the MOVING COIL and the RIBBON. The moving coil is the most common type of microphone. A famous example of a moving coil is the Shure SM58 and the Shure SM57. Moving coil microphones as the name suggests create the electrical energy from the acoustic energy via a moving coil which is attached to the diaphragm. I won't go into detail on how mics are made up. The ribbon mic is not very common although they are making huge advances in this area so this may change. The ribbon mic uses a very thin strip of metal (aluminum normally) that is suspended between two magnets, when the ribbon vibrates the ribbon creates a current. Because the ribbon is so small and light you can get very fast transient responses out of a dynamic microphone that cant be achieved with a moving coil mic.
The condenser mic is hard to explain how it works so I wont even try. There are many books that will help if you are interested. Because condensers don't have any thing attached to the diaphragm. that inhibits its movement it can capture much more subtle movements in the air which includes sound waves. Because of this condensers can generally speaking pickup higher frequencies and faster transients. Because the mass of the diaphragm. is small the diaphragm. can respond much faster to sound waves. Just like a little boat is thrown around by waves where as a large ship hardly even moves up and down when at sea.
Since music is a creative form of expression it is hard to set any rules. There are some rules that will help you choose the right microphone for a job. Sound waves range in size, the lower the frequency the larger the waveform and vise versa. When trying to capture BASS (low frequencies) a mic with a Large diaphragm. will normally be the best choice. When trying to capture TREBLE or high frequencies use a microphone with a small diaphragm. When you cut a hedge you don't use nail clippers to do the job, you use large shears... I certainly hope you don't use the same shears to cut your finger nails !! The same goes for microphones, when you want to mic up a kick drum or double bass you wouldn't use the same microphone that you use the mic up the cymbals on a drum kit.
If your serious about recording then you will have at least 1 large diaphragm. condenser, 2 small diaphragm. pencil condensers and 1 dynamic mic. Condensers generally speaking don't like high SPL so be careful when putting an expensive large diaphragm. condenser inside a kick drum
Another rule is to give the sound at least 1 wavelength minimum to develop. This is very rarely practical, imagine placing a microphone 5 meters away from a kick drum ! Try recording just a kick drum at 10 feet away in a quite room and you'll hear what I mean about letting sound develop. Having a microphone this far away is not practical when the drummer is playing due to spill of course. It is interesting to try things like this when u have a sound proof room and good mics and instruments lying around. Miking up a kick drum you can place the mic 2" from the beater skin inside the shell and you get just a clicking sound as you move the mic to just outside the shell the sound begins to develop and fatten out. Depending on the sound you are after and the amount of spill, experiment with distance to find a good sound.
Most people know about stereo how you can pan left and right to create effects what many people leave out is depth. Try this out, grab a mic and record your voice at 1" from the microphone and then again at 3 foot, give them a quick EQ to take off the extra bass on the 1" track. Play them back and you'll see that if you place a mic close you get a sound that's in your face at the front of the speakers. Then listen to the 3 foot mic and hear that's its back and behind the speakers. You can create depth by using near and far miking techniques. Experiment to give your music an added dimension that other home recordings don't have. Adding reverb to a track can give it the impression it was recorded away from the mic so can certain EQ techniques but you still cant give correct depth without moving the microphone away.
There are three main types of stereo miking techniques...
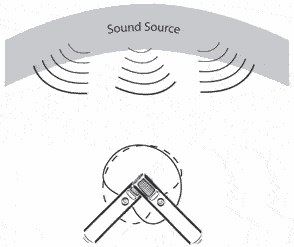
AB (Spaced Stereo pair)
XY (coincidence pair) and the very similar ORTF
MS (mid side)
MS requires a Figure 8 polar pattern microphone and a cardiod microphone. Since not many home studio have a figure 8 microphone I wont go into this one here. This is the technique that translates into MONO the best without any/much phase cancellation. I have used this technique a few times and it works really well.
XY can be done two ways, with the two capsules together facing each other or facing away from each other.... I prefer to face the capsules together since you can normally get the capsules closer together this way. The closer you get the two diaphragms / capsules the better, due to phase cancellations. Two pencil condensers are the best choice for this type of work. The greater you splay the two mics the greater the stereo effect. If you like the XY tech. then you should consider a good stereo mic since these will save a lot of time and have the capsules much closer than what you can get two separate mics which mean they work better and sound nicer than two mics. I have used an Audio technica stereo mic in a studio once and it felt like cheating it was that easy to get the right sound.
ORTF Is not as well known but is basically XY but with the mics the same distance apart as humans ears are. i.e. you space the two cardiod mics about 12 cm. Its a very natural sound which has the advantages of using cardiod mic patterns.
I have left the AB to last since it will flow in to the next topic, the three to 1 rule.... AB is if you put two microphones in a room, one on one side of the room and the other on the opposite side of the room. Hence the name AB. Since two microphones are capturing the same signal at different locations the sound can be in and out of phase in relation to the other microphone. This technique can cause problems when listening to the recording in MONO due to phase cancellation.
A good sound engineer will record and mix his work so that it translates to as many systems as possible, this means no matter how someone listens to the work it will sound the way it was meant to when recorded. Good recordings should sound good on everything from HI FI's to small clock radios, and in MONO and in stereo. One way to make your work translate between mono and stereo is to follow the 3 to 1 rule. The three to one rule is to reduce the phase cancellation. when mixing multiple microphones. Quite simply you need to have at least three times the distance between the microphones as the distance between the microphones and the source of the sound. Once again this is not always possible and rules are meant to be broken. Just beware that your whole mix can change when in MONO if your not careful with following this rule.
No comments:
Post a Comment